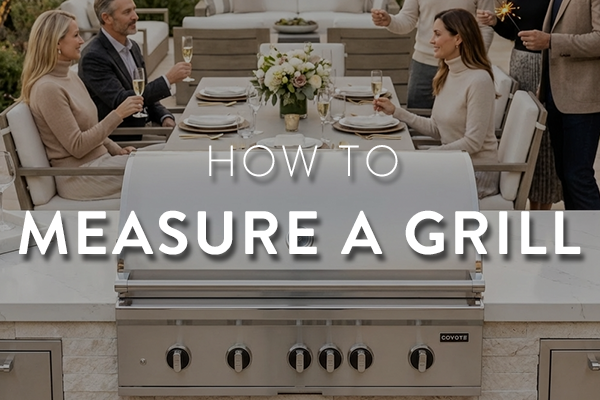
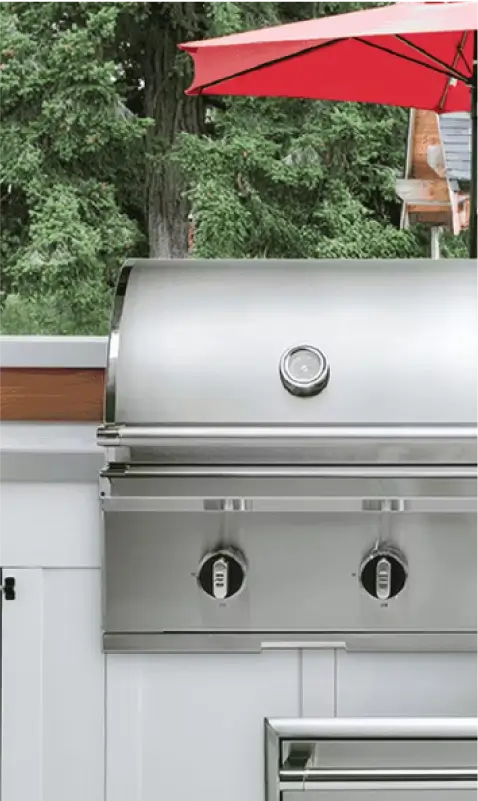
How To Measure a Grill
A Complete Guide

Picking out a new grill?
Don’t get sidetracked with the flashy new designs out there. You’ve also got to consider functionality to ensure you choose a perfect fit for your kitchen setup.
When it comes to ensuring functionality, there’s one thing in particular you’ve got to remember:
taking the right measurements.
This will ensure you get a proper alignment that not only matches your space but also creates balance. After all, no one wants to cook in a cramped or awkward kitchen!
What happens if you don’t get the measurements right? Well, you face some pretty problematic setbacks and even safety risks that will rack up the cost of your project. Poor ventilation, damaged components, and an overcrowded kitchen are just a few of the headaches that will arise when you install a grill that’s been incorrectly measured.
The dimensions of the grill you choose aren’t the only thing to think about when taking measurements. Extra components that will need to be added to your grill will also need to be measured. Take built-in grills, for instance. They need insulated jackets and island cutouts, which bulk up the size.
So, before you go ahead with that swanky new grill, be sure to measure (and re-measure) for accuracy.
In this complete guide, we break down everything you need to know when measuring a grill for your kitchen. We cover:
Jump in to learn how to measure your new grill and achieve your dream outdoor kitchen.
How To Measure a Grill
Checklist of Tools
You'll Need for
Measuring a Grill
If you thought you just needed a measuring tape to get the dimensions of your grill and ensure a perfect fit, think again!
There’s a little more to it. Here’s a complete checklist of everything you need for measuring your new grill:
01
Measuring Tape (preferably metal)
Spans larger distances without bending, so you can take accurate measurements more easily.
02
Pen/Pencil and Paper or Phone/Tablet to Record
As good as your memory might be, it’s always best to play it safe and jot down the measurements on paper or in your smart device’s notes app.
03
Straight Edge Ruler
Super helpful for checking the flatness when measuring any cutouts or uneven surfaces.
04
Safety Gloves
Grills are known to have some sharp and rough edges, so gear up with some safety gloves to prevent any mishaps.
05
Level
If you’re working with sloped patios or trying to get a perfectly levelled countertop, you’ll definitely need one of these tools.
06
Flashlight
Measuring a corner or crevice with minimal light? A flashlight will give you extra visibility to help you take down accurate measurements.
07
Masking Tape or Painters Tape
Fantastic for marking any measurement points or labelling components without leaving behind a mess.
08
Digital Caliper (optional)
If you’re measuring smaller components, like bolt holes, knob shafts, or gas fittings, then a digital caliper will be your best friend in taking accurate measurements.
09
Camera for Documenting Measurements (optional)
A visual reference is incredibly handy when shopping around for grills and extra parts, especially when you’re consulting with installers and store assistants.
How To Measure a Grill
How To Measure a
Built-In Grill for
Installation
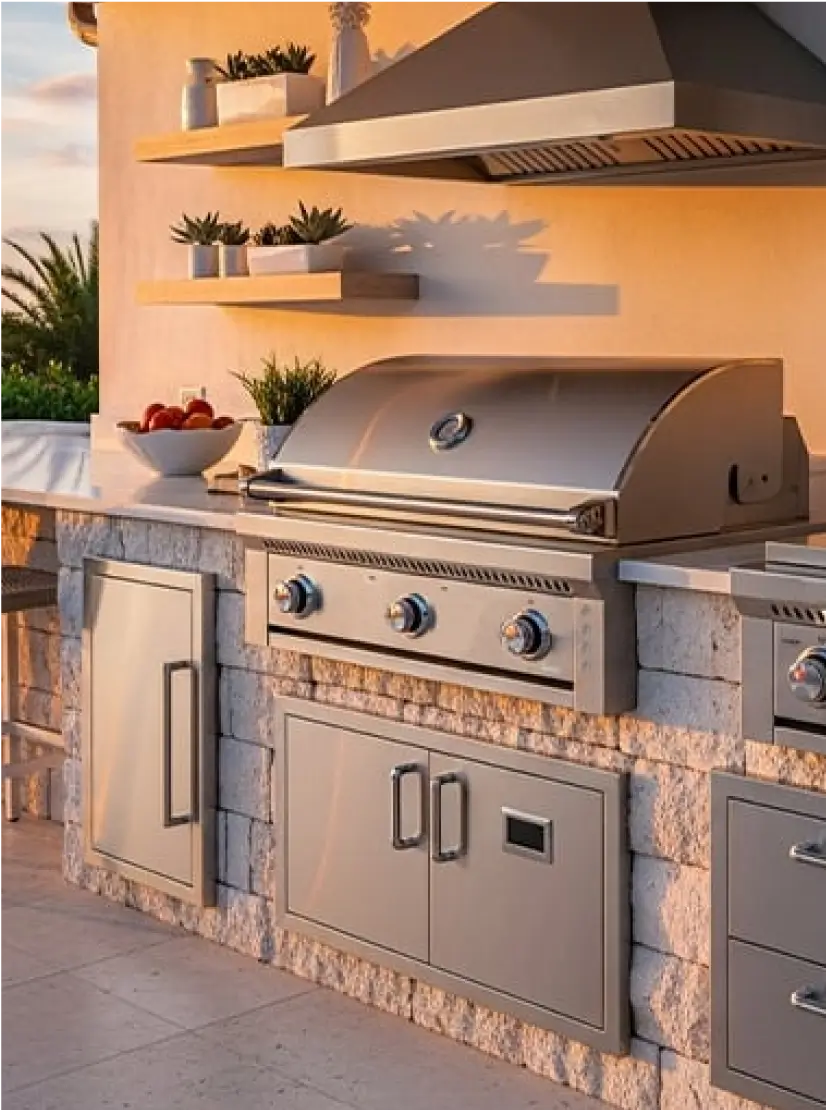
Installing a built-in grill isn’t your average grill setup job. Precise measurements, special planning, and most important of all, attention to detail are all key ingredients in the recipe to fitting your custom grill properly.
Not sure where to start? Don’t worry. From understanding cutout dimensions to avoiding common mistakes, this section walks you through every single step to getting a perfectly fitted built-in grill.
Why Cutout Dimensions Matter
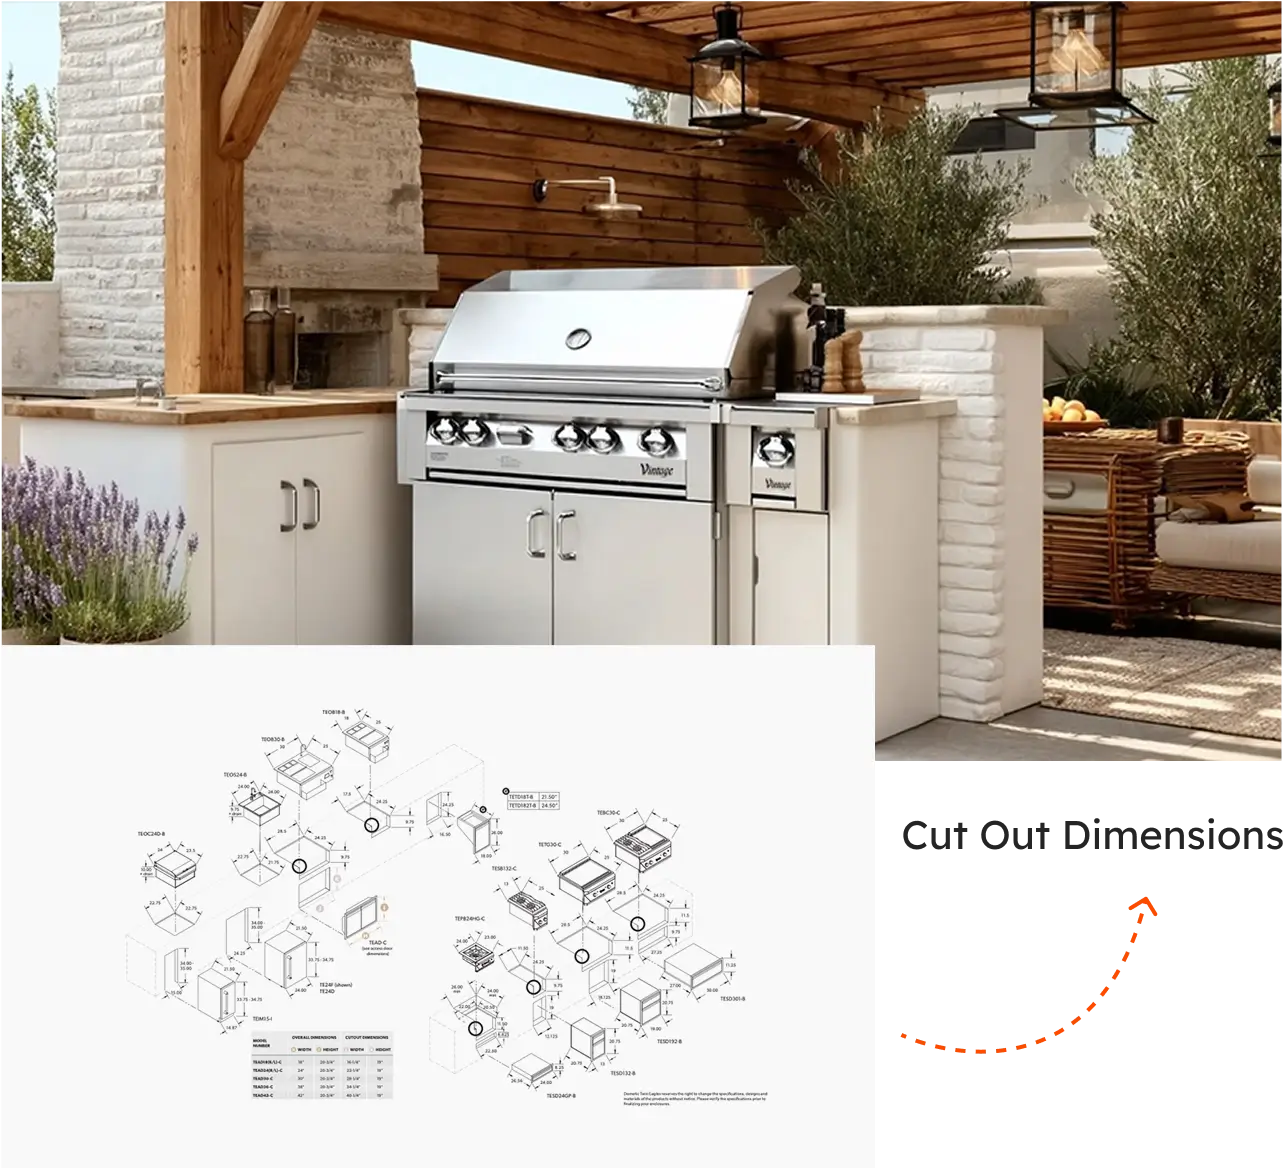
The cutout is the space in your kitchen island where your bespoke grill will sit. Getting these dimensions right is the key to achieving a smooth and safe functioning grill. It will prevent troubles, like poor ventilation and overheating which can lead to a fire risk and damage your grill.
You’ve got to make sure you’re using the right cutout specs outlined by the manufacturer to get that perfect fit. And for the custom island configurations, you have to integrate the grill size with the countertop layout, storage compartments, and side appliances, so that everything falls into place without any clunkiness or clutter.
Something people forget about accessibility when repairing or replacing components in your grill. Having enough clearance in the cutout space will make it easier for the pros to get in there and sort out any problems that may arise down the line.
5 Steps for Measuring a Built-In Grill
Measuring a built-in grill isn’t as tricky as you might think; it just requires some attention to detail and accuracy. Once you know what you’ve actually got to measure and how, it’s a walk in the park!
Here’s a fool-proof step-by-step guide to measuring your built-in grill:
Step 1
Measure Width (left to right)
Start off by taking the horizontal distance across the opening of your island cutout. Make sure you measure both the front and back just in case there’s any uneven construction. Once you’ve jotted down the width dimensions, compare them to your grill’s cutout width from the manufacturer, and not the overall grill width.
Step 2
Measure Depth (front to back)
Measure the depth of the cutout by starting at the front edge of the opening to the back wall. Make sure you account for any extra bulk, like the vents on your grill (if relevant), and avoid any countertop overhang in your measurements.
Step 3
Measure Height (top to bottom)
Time to measure from top to bottom to get the height. Start off with the countertop surface all the way down to the base of your cutout. Again, you’ll need to leave some extra clearance if your grill needs ventilation underneath.
Step 4
Note the Gas Line or Electrical Connections and Their Placement
Your grill will have a special inlet for gas and electrical connections, which will need to be considered during measurements. It’s worth getting some masking tape and marking the exact position of the gas inlet and electrical components, like wiring, so that there’s unobstructed access when you install your grill.
Step 5
Include Side Clearance (if needed)
The sides of your grill might have some extra bulk to it that will need to be included in measurements, like ventilation or accessory mounts. Make sure you measure enough space for these extra components. When in doubt, double check the minimum clearance outlined by the manufacturer.
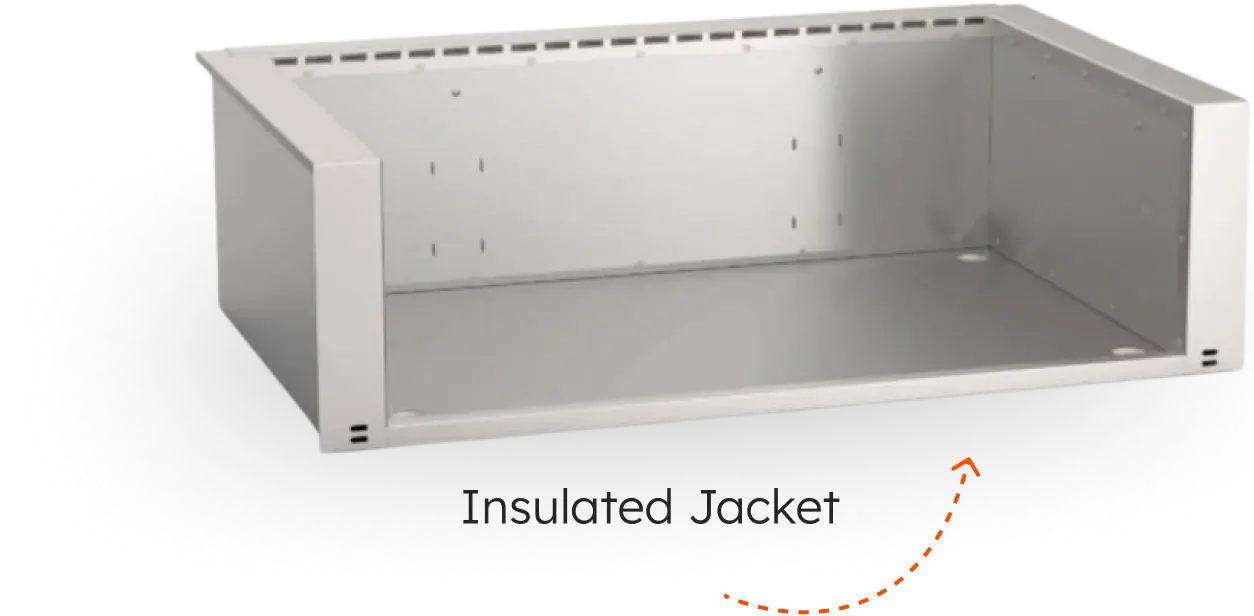
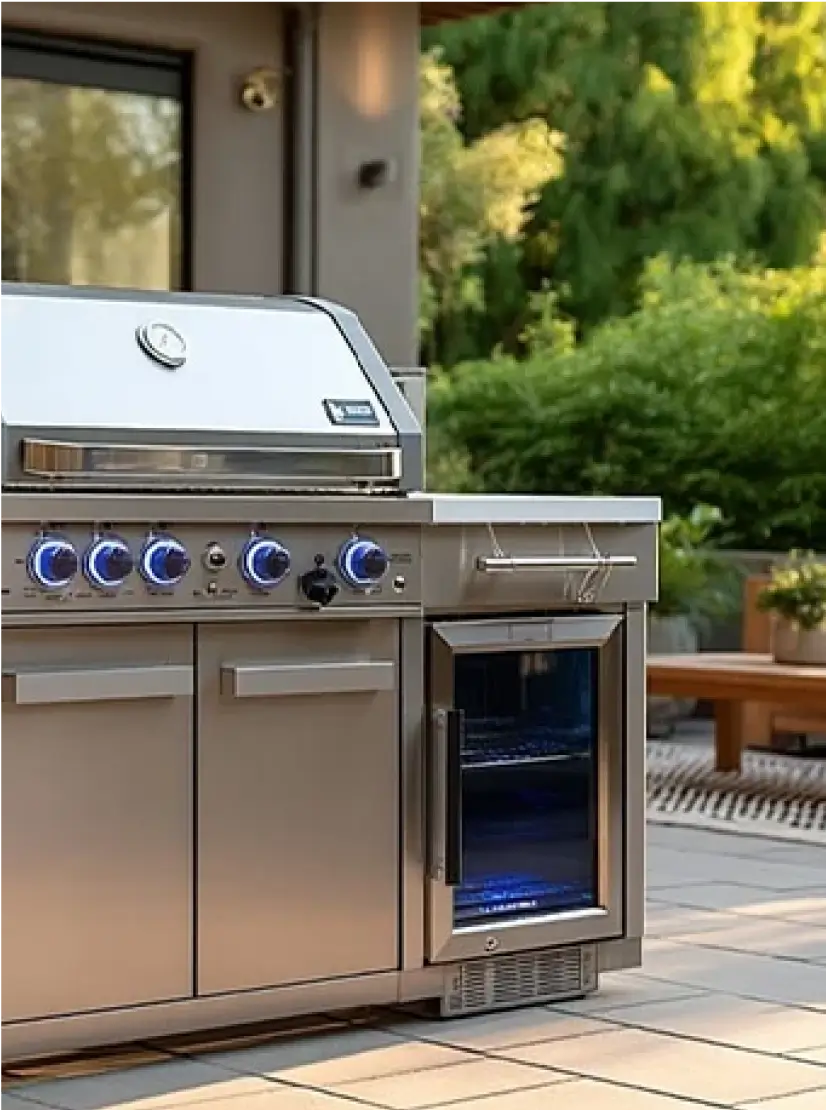
Insulated Jackets: What They Are and Why They're Required
When measuring a grill, you’ve got to take into account the actual grill body and the insulation jacket, especially if you’ve got an island built with combustible materials.
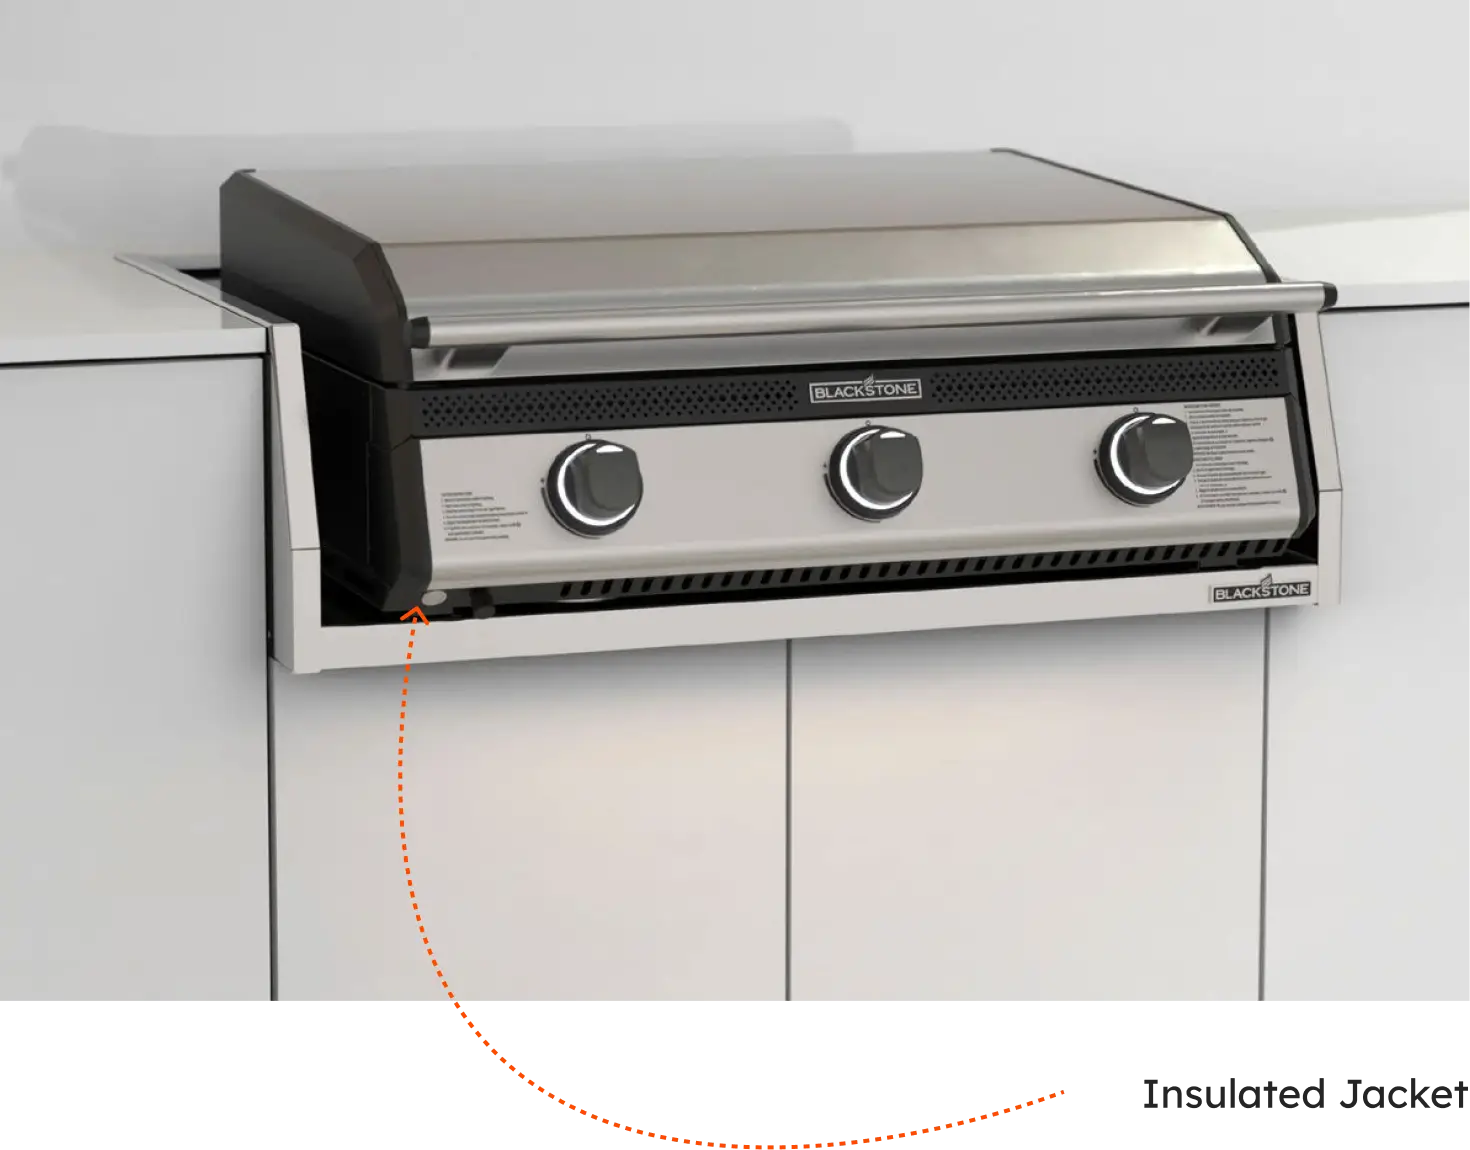
What is an insulated jacket, you ask? It’s essentially a metal layer that hugs the grill body, protecting any surrounding combustible surfaces, like teak wood and PVC. You absolutely must have one of these protective linings to keep everything safe and functional.
When measuring for your new custom grill, you’ll want to measure the insulated jacket first and make sure you’ve got enough space in the cutout to fit the jacket with the grill body. To measure an insulated jacket, record the width and depth. Then measure the height from either outer edge. This will ensure the cutout fits the jacket and not just your grill.
Remember: insulation jackets aren’t a ‘one size fits all’ kind of deal; they are designed for different makes and models. For instance, the Alfresco Insulated Jacket AIJ-56 is designed specifically for 56-inch built-in gas grills, whereas the Blaze Insulated Jacket BLZ-4-IJ is made for 32-inch 4-burner gas grills.
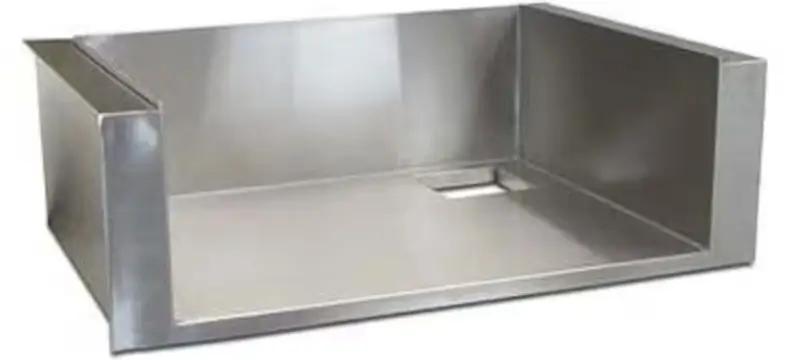
Alfresco Insulated Jacket For 56-
Inch Built-In Gas Grills
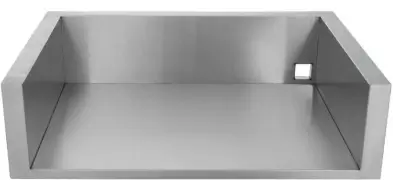
Blaze Insulated Jacket For 32-
Inch 4-Burner Gas Grills
Common Mistakes To Avoid
Mistakes can happen, but when it comes to fitting a custom grill, they can cost you extra dollars (and cause a headache!). To avoid any mishaps from happening, you’ll need to familiarise yourself with the most common slip-ups that can occur when measuring a built-in grill.
Here’s what to avoid:
01
Using external grill dimensions instead of cutout dimensions from the manufacturer’s specs.
02
Ignoring potential slope or unevenness inside your cutout space. Even small differences make a big impact on how your grill will sit.
03
Forgetting to account for rear vent clearance. Without it, there’s a risk of blocking airflow and overheating your unit, which doesn’t just lead to damage, but also fire danger.
04
Overlooking the countertop overhang that can otherwise reduce the opening width. This is a super sneaky culprit that stops grills from seamlessly falling into place.
05
Not double-checking the alignment of gas and electrical components.
06
Measuring just once risks inaccurate dimensions and misalignment. Always re-measure at least twice to be certain you’ve got accurate results.
07
Skipping insulated jacket requirements. Remember that the cutout must match the jacket, not the bare grill body alone.
08
Assuming all brands fit the same. You’ll actually find that different manufacturers have their own signature dimensions. For instance, a -inch grill from one brand might not match the cutout of another, so always double-check.
09
Forgetting about the side clearance requirements needed for ventilation and extra accessories.
How To Measure a Grill
How To Measure Your
Grill for a Cover
Got a grill but nothing to cover it with? You’ll need to accurately measure your grill unit to get the right cover that fits like a glove. A grill cover is a canvas, polyester, or vinyl protective layer that protects the grill when it’s not being used. It’s designed to shield from rain, dirt, dust, pests, and UV rays.
Let’s see what you need to know about measuring a grill cover…
Why You Need Accurate Cover Measurements
The measuring doesn’t stop after you’ve fitted your grill; you’ve also got to measure the cover that will protect it!
Here’s why it’s so important to get those measurements right:
01
Prevents Wear and Tear
If you’ve got an ill-fitted grill cover, your grill won’t be completely protected, meaning certain areas can become vulnerable and exposed to wear and tear.
02
Ensures Proper Coverage
Handles, side burners, and chimney stacks all need to be protected when your grill isn’t cooking up cuts of meat. Accurate measurements will ensure you account for these extra bits.
03
Prevents Water from Pooling
When well-fitted, a grill cover won’t sag, so rainwater can’t collect, which otherwise leads to mould and mildew growth.
04
Shields Your Grill’s Finish
A snug-fitted cover won’t rub against your grill, so you needn’t worry about chipped or faded paint and scratches on the grill surface.
05
Promotes Proper Airflow
With a cover that fits just right, your grill will get proper ventilation while still being protected. This is especially important when it comes to preventing trapped moisture, which can cause rust, corrosion, and mould growth.
Measuring for a Grill Cover: Your Step-by-Step Guide
Here’s a fool-proof step-by-step guide to measuring your grill for a cover:
Step 1
Measure Grill Width (side to side, including side shelves if permanent)
Get started with the widest point of the grill, not just the main body. Make sure you include the measurements of fixed side shelves and side burners that don’t fold away. Don’t bother measuring any removable accessories because these get taken off and stored elsewhere after use anyway.
Step 2
Measure Depth (front to back, with lid closed)
Take your tape measure to the front edge of your grill and all the way to the very back. Account for any knobs or handles in your measurements and make sure the lid is fully closed. If any rear handles, vents, or rotisserie add-ons protrude, measure them in too. Always jot down the largest depth measurement to avoid a fit that is too tight.
Step 3
Measure Height (from ground to top of lid or stack)
No one wants a cover that’s too short or dragging on the floor, so the height measurement is extra important. Start at the ground (or base of the grill if it’s on a cart/stand) and measure all the way up to the tallest point. Include any bits that stick out on top, like chimney stacks and lid handles. If your grill is decked out with a warming rack or an upright extension, add those measurements in as well.
Step 4
Account for Side Burners, Handles, and Knobs
Make sure you note down any extra components that stick out when taking measurements, including the side burners, handles, and knobs. Measure how far the knobs extend beyond your grill’s main body and double check your side burners for lids or covers that might bulk them up.
By taking these components into account in your measurements, your cover won’t be strained at the seams or struggle to fit around any fixed protrusions on your grill.
Additional Tips
Here are some extra tips to help you find the perfect fit for your grill:
01
Choose material with some flexibility (like vinyl, polyester, or canvas).
02
When in doubt, leave 1–2 inches of margin for airflow and shrinkage.
03
If you’ve got a particularly unique grill with bespoke components, go for a custom cover.
04
Go for a cover with UV-resistance and waterproof (not just ‘water-resistant’) qualities.
05
Pick covers with tie-downs or elastic hems for extra security.
How To Measure a Grill
How To Measure the
Cooking Area of a Grill
Your cooking area is where the magic happens. Making sure you get the measurements right is a key ingredient to creating enough deliciously sizzling dishes to feed all your pals and family.
Too often, manufacturers will give misleading claims about cooking space which leads to fellow buyers like yourself overestimating how much food they can cook at once. This results in too many people stuck with grills that feel cramped and are too small for big cook-outs.
Another confusion faced is the difference between the primary cooking area and the total cooking area. They are actually two different things!
We’ve put this section together to clear up any confusion and help you get the measurements of your cooking area spot on.
Why the Cooking Area Matters
Your cooking area is the place where you bring your meals together. You need enough space to cook for the whole family and all your friends, otherwise you risk an overcrowded space and unevenly cooked food.
Ideally, you want to be able to get a few steaks, burgers, and skewers going all at once when you’re hopping on the grill, especially if you’re playing chef for a big crowd.
Having proper spacing isn’t just important for cooking enough food all at once; it’s also crucial for safety. Having ample room to grill food ensures proper airflow, preventing overheating, which doesn’t just lead to uneven food, but also creates a fire risk.
Primary Cooking Area vs. Total Cooking Area
The primary cooking area is the main grill surface. It’s the grate that sits directly on top of the burners or charcoal — here is where you do all your grilling, searing, and cooking.
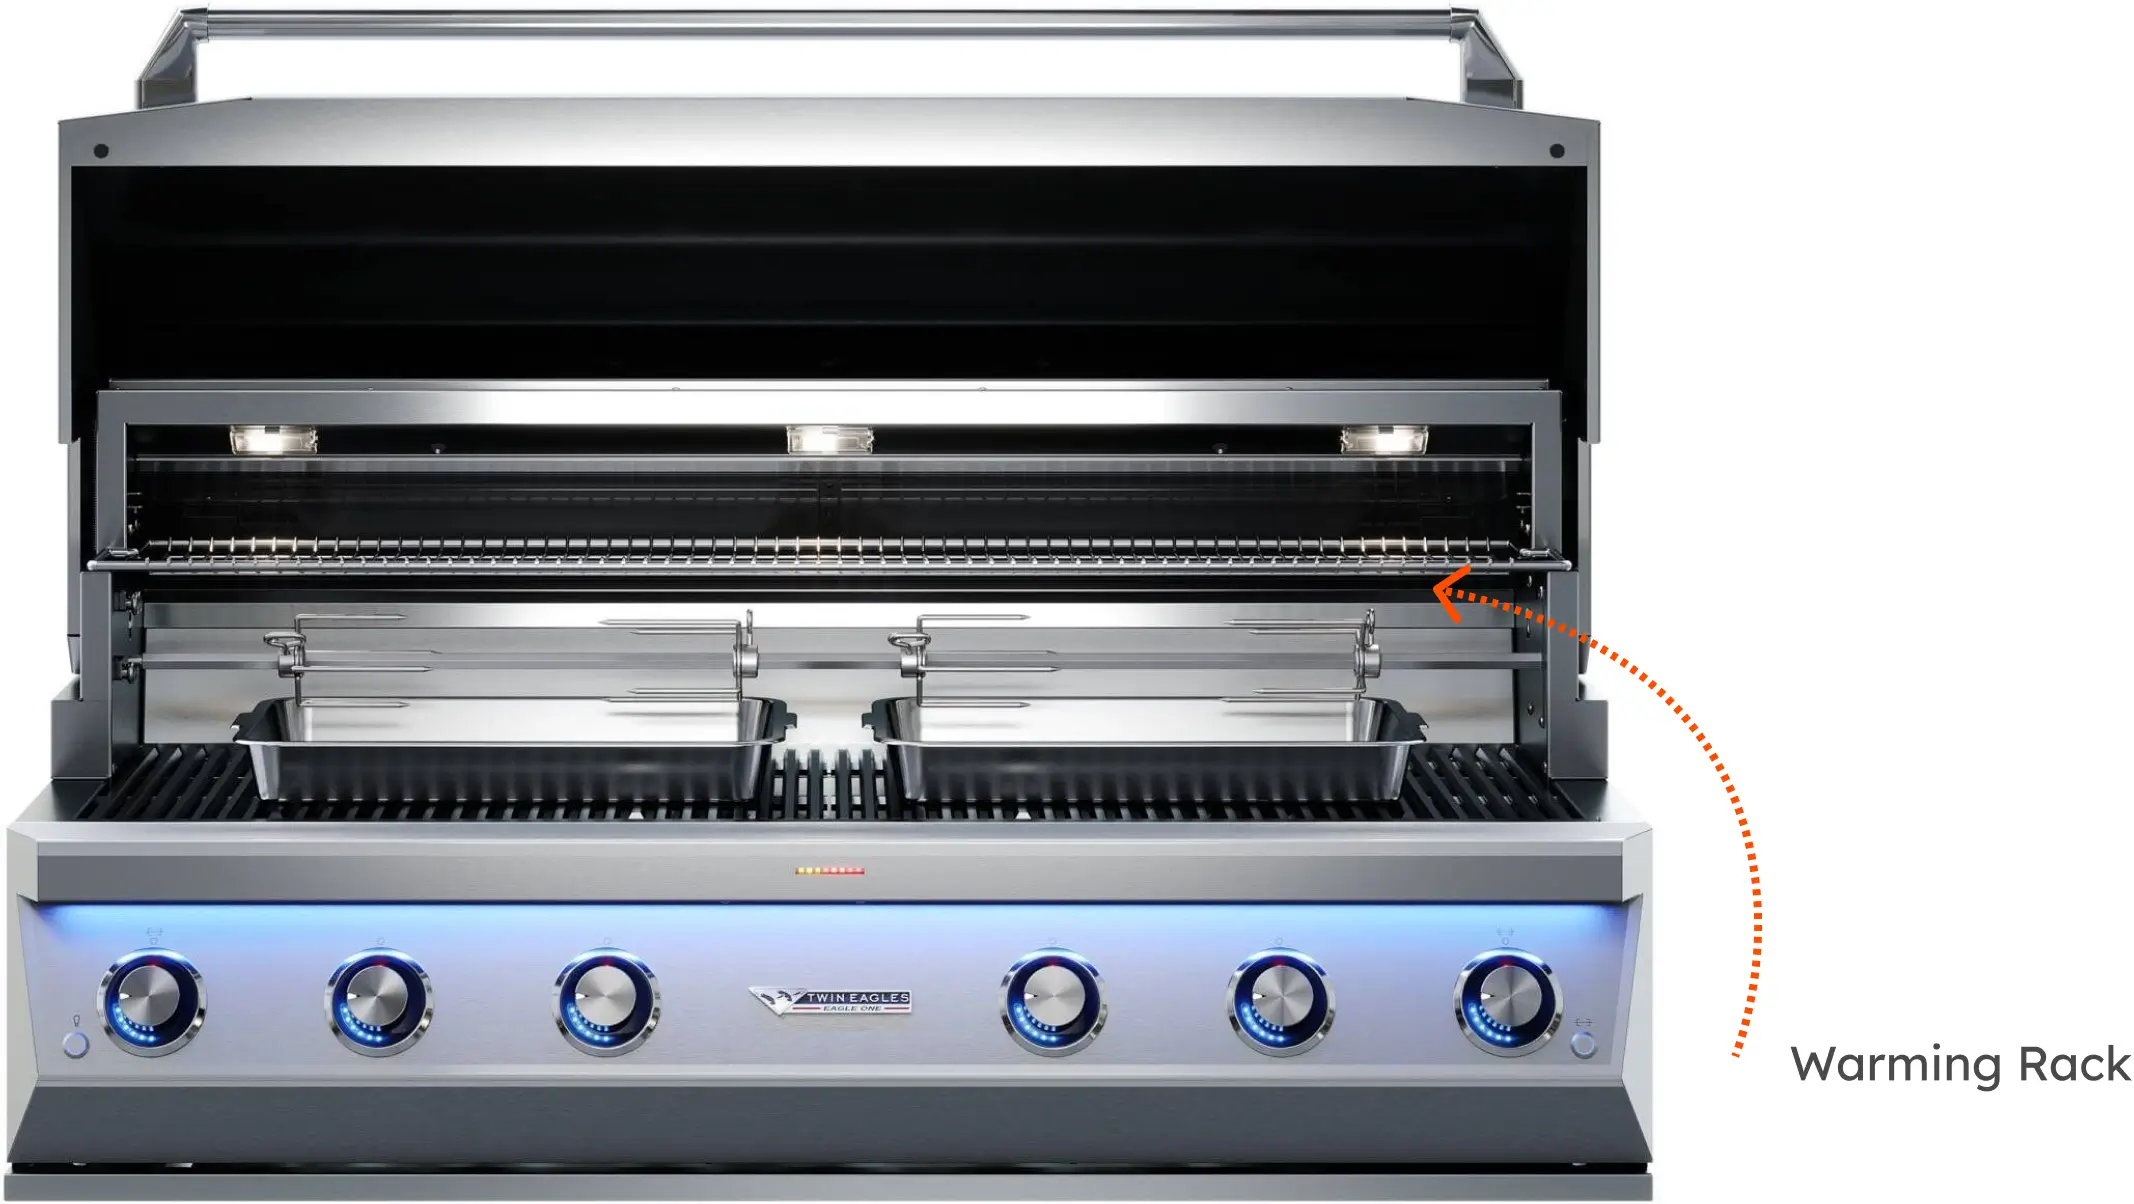
Then you’ve got the secondary area, also known as the warming rack space. This is just above the main grate and is designed to keep your tasty delicacies nice and warm, so you and your guests can tuck into a sizzling meal. They’re also handy for toasting burger buns as they give off enough heat to get bread toasty, without burning it.
Something to keep an eye out for is the measurements that brands offer for these areas. Companies will often include both the primary cooking area and the warming rack space together as the total cooking area. This gets confusing and often leads to customers thinking they’ve got more room to grill.
Cooking Area Size Guide
Not sure how much room you need for grilling? Here’s a rough size guide to help you out:
01
Feeding an Average Family of 4
About 400 to 500 sq. in. of primary cooking space (fits roughly 15 to 20 burgers at a time).
02
Entertaining Groups of 8 to 10 Guests
Around 600 to 700 sq. in. of primary cooking space. Ideal for grilling larger cuts of meat, like steak, at once.
03
Hosting Large Gatherings and Parties
900+ sq. in is needed for high-capacity get-togethers. If you’re a regular host, make sure you size up.
How To Measure a Grill
How To Measure the
Primary Cooking Area Yourself
Before you invest in a brand-new grill, it’s a wise idea to measure the primary cooking area to get an accurate idea of how much real cooking space you have. Here’s how you can easily measure models yourself:

Step 01
Count the Number of Grates
Find out how many main cooking grates the model has by counting them individually. Sometimes you can get lots of smaller grates laid out side-by-side, which is ideal for cooking smaller portions together (it’s also great for cleaning and ensures flexible replacement), whereas larger pieces are good for cooking up bigger cuts of meat.
Step 02
Measure the Length and Width of the Main Grate
To measure the length of the main grate, grab your measuring tape and record from right to left. And for the width, jot down the measurements from front to back. If the model has multiple grates, measure each one individually.
Step 03
Multiply To Get Square Inches of the Primary Cooking Area
Multiply the length by the width of each grate. If you’ve got more than one grate, add the results up to get their total cooking space. Or, if they are all identical in dimension, you can just multiply the total of one grate by how many there are.
So, if you’ve got one large grate, the measurements will look like this:
12″ x 18″ = 216 sq. in
If there are two 12″ by 18″ grills, you’d multiply the total of one grate by how many there are on the grill to get the total primary cooking space, like so:
12″ x 18″ = 216 sq. in
216 x 2 = 432 sq. in
Primary Cooking Space
More Example Calculations
Here’s a few more examples of what calculations would look like for different types of burner models and grill designs:
5-Burner Models
Bigger 5-burner models usually pack three grates. Say the grates measure at 12″ × 20″ each, you’d do the following calculations:
12 × 20 = 240 sq. in
Per Grate
240 × 3 = 720 sq. in
Primary Cooking Space
Rectangular Grills
If you have a continuous grate measuring 30″ by 18″, multiply the dimensions like this:
30 × 18 = 540 sq. in
Primary Cooking Space
Then account for the warming rack (if it has one). So if the rack is 30″ by 8″, multiply them together to get the square inches:
30 × 8 = 240 sq. in.
Next, all you need to do is add the primary cooking space and the rack area together to get the total cooking area:
540 + 240 = 780 sq. in
Total Advertised Cooking Space
Round Grills
Round grills might seem trickier to navigate than a rectangular grill when taking measurements, but it’s not as difficult as it might seem. You’ll need to use the formula for the area of a circle, which is π × radius². This calls for a calculator. Start by getting the diameter, then finding the radius.
The diameter is the length from side to side inside a circle. The radius is half of this length. So, if the diameter is 22″, you’ll need to do this calculation:
22 ÷ 2 = 11” diameter
To get the area, the calculation will look like this:
Area
=
3.14 × (11²) = 3.14 × 121 ≈ 380 sq. in.
cooking space
How To Measure a Grill
Measuring Tips for Grill
Replacements or Upgrades
Once you’ve got your grill measured and fitted, don’t chuck out your measuring tape. You’ll still need it to measure future replacements and upgrades.
The smallest of differences between brands and generations of models can create big installation challenges, so it’s super important to uphold the same level of accuracy as you would when finding a brand-new grill. Getting dimensions as accurately as possible will also stop you from getting the wrong fit, which can lead to more money wasted down the line.
Replacing an Existing Grill with the Same Brand
To replace a grill you’ve already got with the same brand, find the model number (it’s usually on a plate or sticker inside the cabinet, behind the drip tray, or somewhere around the gas line connection).
Using the model number, search the manufacturer’s website to get the official spec sheet with all the cutout dimensions of the model. Check these dimensions against the spec sheet you received when you got your model. It’s common for newer models to have slightly different cutout dimensions, which is why you’ve always got to double check.
If the dimensions match, you can reuse the cutout you’ve already got. But if they differ, you’ll need to either expand the cutout or look for a new model with closer dimensions to the one you’re swapping out.
Top Tip for Future Proofing: Sticking with the same brand makes replacements smoother because it’s much more likely for accessories and jackets to stay compatible.

Switching Brands
You might have a little more trouble finding other brands that match the specifications of your current model. But that doesn’t mean it’s impossible; it just means it will take a little more searching around.
Always check cutout specs, take accurate measurements, verify accessory compatibility (like add-on rotisseries or sear burners), and review the clearance requirements for ventilation. Plan ahead for connections, like gas and electrical hookups, as different models and brands will likely have different positioning needs.
Retrofitting a New Grill Into an Old Island
There’s a lot to plan ahead for if you’re going big and retrofitting a new grill into an old island. For starters, you’ll need to rework countertops to fit the new grill’s dimensions. If the new grill is smaller, you’ll have to patch and seal any gaps so everything is safe and neat.
Older islands need reinforced structure to keep them sturdy and safe, so you’ll want to call a specialist to check out your island and assess what structural elements need to be installed to make it more durable.
How To Measure a Grill
Recap
To recap, remember to measure these three main measurement types:
01
Cutout for built-in
02
Grill cover
03
Cooking area
Always measure the area twice to avoid errors, account for any protrusions, compare your measurements to the manufacturer specs (not just the overall grill dimensions), and always account for gas and electrical dimensions.
Remember: the more accurate you get your measurements, the more time and money you’ll save, while ensuring you get a perfectly fitting grill that matches your needs.
Need Expert Help?
Measuring grills can get tricky, especially when dealing with built-ins, cutouts, or custom outdoor kitchens. That’s where Grillio’s grill experts come in — we’re here to make sure you get it right the first time. If you’d like personalized guidance, contact us here.
What if my grill has unusual features (like rear infrared burners, smoker boxes)?
If your grill has a few unique features that protrude, measure the farthest protruding point and not just the main body. Factor those measurements into your final cutout or cover dimensions to ensure you get a perfect fit. Also, check the manufacturer’s clearance specifications, especially if you’re measuring extra burners as they need ample airflow.
What if I can't find the original spec sheet?
Simply search the model number of your grill on the manufacturer’s website. If you can’t find it you can measure the width, depth, and height yourself.
Can I use the dimensions listed on the website?
The dimensions on the manufacturer ‘s website are a good starting point, but you’ll need to take your own measurements to be certain the finer details all measure proportionately to your space.
What happens if I make the island cutout too big?
This is a straightforward fix. You’ll just need to get trim kits, filler panels, or a professional to help rework the countertop. If you leave any gaps, there’s a risk of grease, moisture, and heat getting trapped which will damage your island and create health risks.