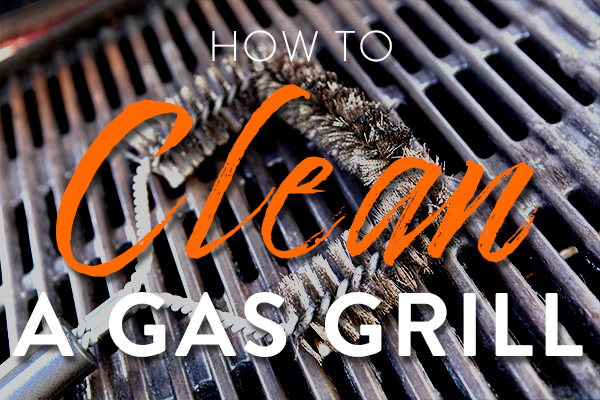
HOW TO
clean
A GAS GRILL

Grilling— it’s one of America’s favorite pastimes, and a summer hobby that everyone can benefit from, whether you are the chef in charge, or a guest who gets to enjoy some freshly grilled food.
And while grills are often seen as seasonal, depending on where you live, that doesn’t mean they don’t get plenty of use during the warmer months! As such, you might be surprised at just how grody your gas outdoor grill can get.
Read on for step-by-step guides on how to clean your grill, why it should be done, and the safety measures you should take before getting in there and scrubbing!
Why Do You Need To Clean Your Gas Grill?
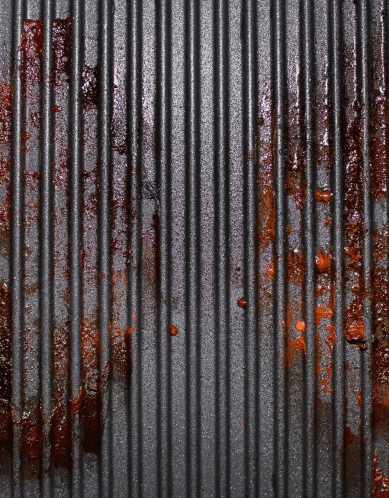
From old grease to chunks of meat, leftover pieces of vegetables to errant bits of briquet, your grill can be incredibly dirty by the end of the season. And while some people might attest “that’s where the flavor comes from”, it is far from the truth.
Cleanliness is indeed next to godliness, and your grill is no different. Leaving a buildup of grime within your gas grill will adversely affect the taste of your food.
That’s because the grease buildup will make it more likely for food to burn to the grill top or otherwise take on the aroma of burnt items that are still on the bottom of the unit.
Additionally, mold could start growing on bits of food that were not burnt to cinders, and even if something has been burned almost completely away, there is still the risk of bacteria forming on it. You’d be surprised by the number of nooks and crannies that food bits can fall into and stay within the whole time!
With blockages formed by charred food or clogs of grease, you might even notice
Negative Effect on performance
With blockages formed by charred food or clogs of grease, you might even notice
Bad impact on the Lifespan of the grill
To keep everything working smoothly and extend the lifespan of your unit as far as possible, cleaning it is the first step.
Plus, leaving your grill to get dirty is a major safety hazard. You can avoid flare-ups by scrubbing everything down after use, and it will help with the overall flavor of your dishes.
Grease fires are also more common in uncleaned gas grills, where a buildup of such a flammable substance occurs across the surface of your grill or in the drip pan. These types of conflagrations are highly dangerous and difficult to put out, so avoiding them altogether with a good cleaning regime is the best course of action.
Safety First
As with everything else related to gas outdoor grills, it’s important to take safety precautions before doing anything else. And the process of cleaning the grill is no different.
Because you are dealing with highly flammable substances, including grease residue and the gas that fuels the entire unit, it’s essential to put safety first. The following tips will guide you through the process of cleaning a BBQ grill safely!
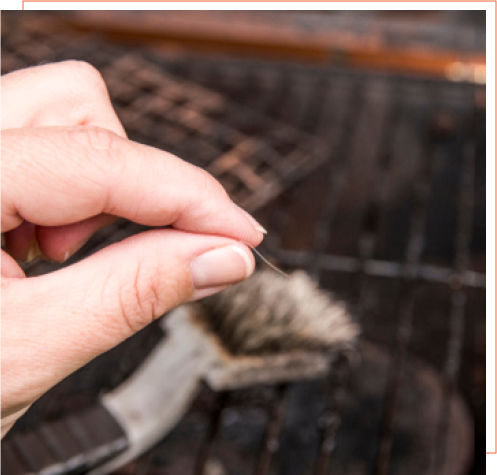
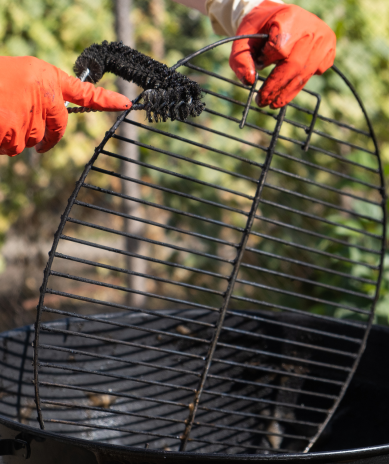
- Be Bristle Aware
- Let It Cool
- Remove The Fuel Source
- Steamy Safety
- Tool Precautions
- Use The Right Products
Be Bristle Aware
When you are finished scraping the grill, use a damp cloth to wipe down the area you have just gone over. This is to remove any bristles or wire filaments that might have gotten dislodged from the brush and are stuck to the surface.
You would be surprised by the dangers posed by bristles: these sharp little objects can attach themselves to your food and cause cuts in the mouth or even intestinal distress! So, it’s essential to wipe everything down and make sure none of them are left behind.
Let It Cool
You don’t want to clean a stone-cold grill surface, as the food and other residues will be solidified and difficult to scrape away easily. However, by heating up the grill for about 10 to 15 minutes before you plan to clean, it can loosen the grime significantly.
After it’s heated up and you have turned off the grill, don’t try to begin the cleaning process right away. The residual heat will last for a while and keep the food bits malleable, but if you try to scrub the unit while it’s still hot, you expose yourself to the risk of significant burns and possibly a trip to the hospital.

Remove The Fuel Source
Once you have preheated the grill to loosen some of the gunk and debris clinging to the grate, switch off the unit’s fuel connection completely. The last thing you want to happen is for the grill to accidentally ignite while your hands are near the burners!
The best way to ensure all fuel sources are removed is by turning off the gas line attachment or detaching the propane tank. Additionally, make sure that you switch all knobs to the “off” position so there is no seepage.
Steamy Safety
Even after letting the grill cool down a bit, until it’s no longer a burning hazard to touch, you should still make sure not to lean over the cooking surfaces when scrubbing it down with water.
The combination of hot grill grates or the interior of the grill with water can cause plenty of steam, and it can be much hotter than you realize, leading to more burn risks.

Tool Precautions
As you use the bristle brush, scraper, and other cleaning tools, always be careful of your hands and fingers, moving the tools away from you instead of scrubbing or pulling towards you.
One slip when using the wrong cleaning motion and you could end up with a palm-full of metal bristles, or a sizable laceration on your finger!
Use The Right Products
For the most part, water and dish soap are adequate cleansers for an average gas grill and the amount of grime that builds up. But if you think the job calls for something more substantial, there are a few products out there that are specifically made for cleaning your grill.
It’s wise to stick to these grill products instead of using other types of cleaners that could be harmful when put on a cooking surface. For example, other heavy-duty cleaners can have chemicals, carcinogens, and are dangerous to inhale or ingest. These are not the types of cleaning products to use on a grill!
Full Grill Cleaning
While you do not always have to opt for a full grill cleaning every time you head out to maintain the unit, it’s a good idea to know how to do it.
While there are a variety of professional services that will come in and clean your drop-in gas grill for you, depending on where you live, you will save money and gain a better understanding of your outdoor cooking unit if you clean it yourself!
Grills are one of those cooking implements that manage to accumulate more and more gunk as you use them, so giving yours a full clean-out every now and then is a good idea and essential to keeping it running well, cooking delicious dishes, and staying a safe unit.
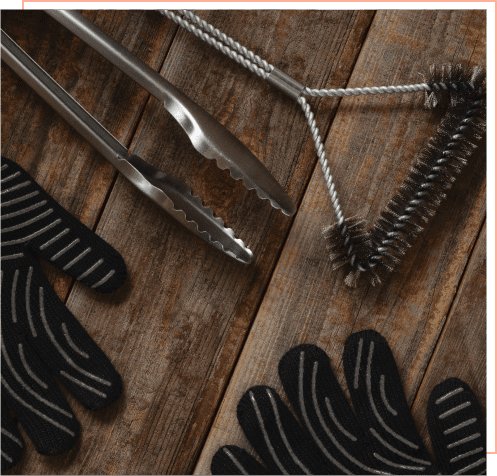
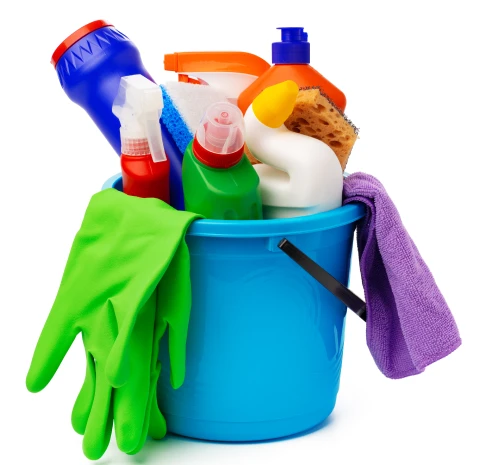
What You Need To Clean A Gas Grill
Make sure to gather your supplies before starting— you don’t want to be elbow deep in scrubbing out grease when you realize you forgot the paper towels! The following items are everything you need to get your grill sparkling again:

Grill Brush

Bucket

Grill Cleaner

Paper Towel

Vacuum Cleaner

Work Gloves

Putty Knife Or Scraper

Spray Bottle Or Garden Hose
How To Deep Clean A Grill In 10 Steps
For any grills that need some extra TLC, these are the ten steps to follow. Perhaps you just grilled all weekend for a family gettogether in your backyard, or you realized that the grill hasn’t been properly cleaned for a couple of months.
But not to worry! It might seem like a daunting task at the start, but once you pull on those work gloves and ready your soapy water, the job of doing a full grill cleaning will be over before you know it.
And if you are feeling particularly out of your depth, you can check out this handy step-by-step gas grill deep-clean video to get you started.

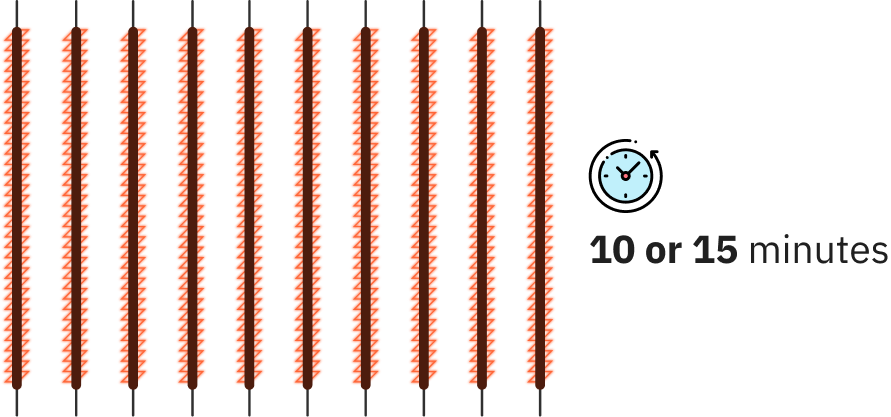
Step One
Heat up the grill
Heat up the grill for about 10 or 15 minutes to soften the debris and grease that has been baked onto the griddle and cooking surfaces. Then, turn off the unit, disconnect it from fuel sources, and allow it to cool until just warm.

Step TWO
Lift the grill grates
Lift the grill grates up and off the unit, and stand them up against a wall or against a porch railing to be scrubbed.

Step Three
Take off any element covers
Take off any element covers, such as ceramic briquets, lava stones, or metal heat tents that are placed overtop of the burners.
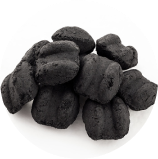
Ceramic briquets
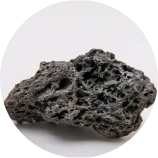
Lava stones

Metal heat tents
These can be soaked for a few minutes and then scrubbed with a wire brush until all the food bits and grease streaks have been removed.

Step FOUR
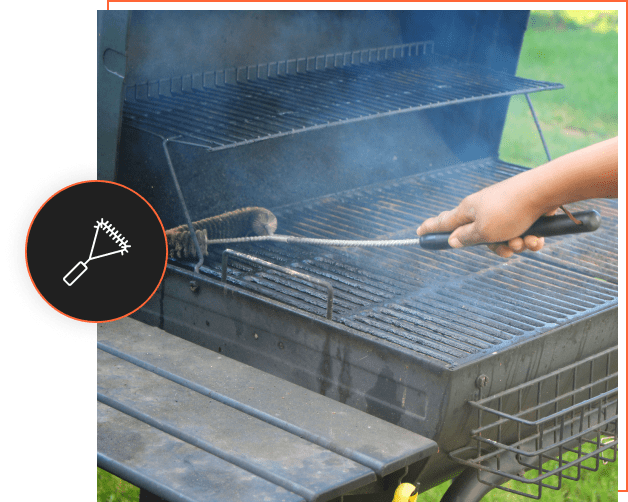
Use your wire brush or bristle scrubber
Use your wire brush or bristle scrubber to scour the grill grates and remove all the grease stains, food chunks, and other debris that has been clinging to the metal.

If this proves difficult, try soaking the grates for about 30 minutes in a mixture of hot water and plenty of dish soap to soften the grease and other grime. Afterward, it should be exponentially easier to remove!

Step FIVE
Use your wire brush or bristle scrubber
Generally situated below the heat deflectors or burner covers, find the burner tubes at the bottom of your grill.
These are quite delicate, so make sure you are using gentle pressure and a light hand as you whisk away any debris in a side-to-side motion.
In addition, make sure each one of the little gas port holes is clear and has unrestricted airflow through them. You can even blow through the holes gently to make sure everything is open.

Step SIX
tackle the main interior space of your grill
Now it’s time to tackle the main interior space of your grill! All the grates and burner covers should be removed, so you will have access to the entire inner surface and all the nooks and crannies.
Grab your vacuum and use it to remove the loose pieces of food, dirt, cobwebs, and anything else you can remove from the main body of the grill. If anything remains lodged there, scrape it loose with your wire brush and wipe it away.
If you notice dark bits that are peeling off in places, don’t worry— it’s not actually paint chipping from the interior! That is simply a combination of grease and smoke that has accumulated and started peeling. To remove it, take your wire brush or putty knife to scrape it away and then vacuum up the bits.
Don’t forget about the interior of the lid, either— use soapy water to scrub out any grease splatters or smoke stains that are clinging on up there.

Step SEVEN
grease tray
Next up is the grease tray, because true to its name, it becomes incredibly greasy and gross.

But make sure you don’t drain out the greasy water just anywhere— it can become environmental pollution if you pour it down a drain, flush it down the toilet, or let it run into a storm culvert.
Instead, carefully pour out the grease into a can (coffee cans work great here) or other such covered containers to prevent spillage, and throw it away securely.

Step EIGHT
let’s reassemble it
Next up is the grease tray, because true to its name, it becomes incredibly greasy and gross.
Now that all the interior portions of the gas or charcoal bbq grill are clean and dry, let’s reassemble it. Start with the lowest portions of the unit and work your way up, from the burner covers to the grill grate. Make sure everything is refitted securely, with no wiggle room in any component’s placement.

Step Nine
Time to tackle the exterior of your gas grill
Time to tackle the exterior of your gas grill. Wipe down the outside surfaces, including side tables and outer burners, with soapy water or a generic kitchen degreasing product, and don’t forget about the lid, base, and back. It should all be gleaming by the time you are done with it!

Step TEN
test the grill out
Finally, it’s time to test the grill out and make sure everything still works just fine. Plug your fuel source back in, be it the propane tank or gas line connection, and carefully fire up the grill.
Time-Saving
Method
Knowing how to deep clean a gas grill is a good skill to have, and you will likely need to complete that type of routine at least once or twice a year.
However, if you want to go through an easier process of cleaning out your grill, there are some time-saving tips and tricks that help get the job done quicker with results that are just as good.
How To Clean A Gas Grill with Minimal Effort
If you want to clean your grill but don’t have a lot of time or patience to complete the job, don’t worry— we have a five-step method that will save time and let you whip through cleaning your gas grill with minimal effort!
Neglected Grill
Cleaning
There are times in the life of a grilling master when their outdoor gas built-in grill needs a bit of extra help to get cleaned up. Perhaps you haven’t had time to properly tidy up the grill this season, or you have just come into ownership of a grill that hasn’t been cleaned in years. Follow these steps to tackle a neglected grill and get it nice and clean!
Here is how to clean a gas grill that has been neglected:
Maintaining
Your Gas Grill
If you want to make sure your grill can handle use and the possibility of grime even better, to lessen the effort needed to clean it thoroughly, then putting some time into maintaining your gas grill is essential.
These are small tasks that need to be done after each grilling session. To see some examples, watch this video on how to keep a gas grill maintained properly! Then, implement the following suggestions whenever you head out to grill up a masterpiece.
Brush, Brush, Brush
It’s a good idea to brush off the grill grates and surrounding areas before you fire up the grill. This will remove any dust or cobwebs that have appeared since your last grilling escapade.
Plus, after preheating your grill sufficiently, you can scrape the grate with a wad of foil or wire brush to get all the little bits of food off of the cooking surface, leaving it nice and clean for your upcoming meal.
And when you are done with your grill for the day, make sure to brush or scrape off the grates again to try and dislodge food bits before they solidify too much. It leaves you with a cleaner worktop for the next cookout!
Good Grease Control
Keep an eye on the grease tray or grease collection unit.
This can easily fill up and lead to the risk of a grease fire, so make sure it is kept empty. Additionally, to make it easier to clean, pop some disposable inserts into the tray to catch the grease!

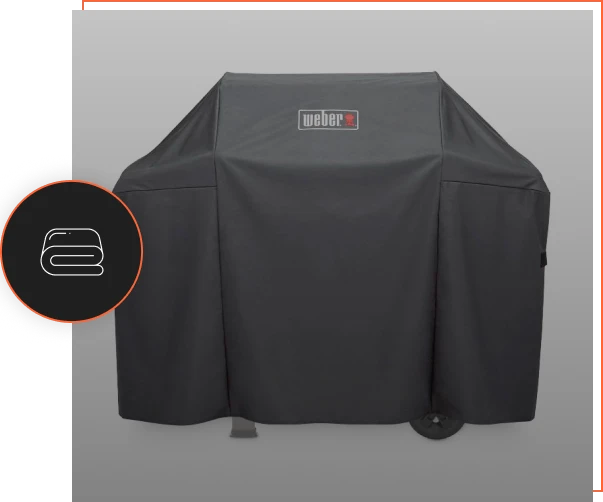
Keep It Under Wraps
To prevent too much natural dirt and debris from infiltrating your grill between cookouts and getting it all mucky, don’t forget to invest in a good grill cover and put it on when you are done grilling!
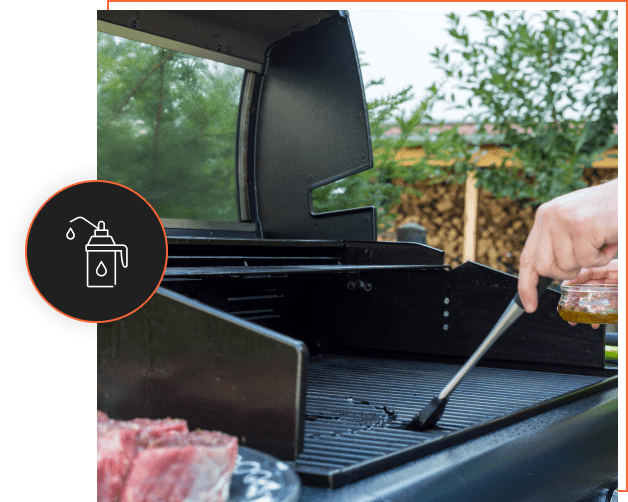
Oil It Up
Make sure you apply oil to the grates as they heat up and before the food gets laid out on the cooking surfaces. This makes it easier not only to flip and cook your meal, but also to clean off the residue later.
How Often Do I Need To Clean My Gas Grill?
After all this information, you might be wondering— how often does this cleaning process need to be done? Well, there are a few answers to that question, depending on use.
Being a gas grill owner comes with the task of keeping the unit spick and span, so you should always carry out some simple cleaning tasks every few times you use the grill.
This might seem excessive, but maintaining a fairly clean grill all season long will lessen the amount of deep-cleaning necessary before you put it away for the winter.
If you use the grill every single day,
Opt for a bi-weekly cleaning schedule
To keep on top of the smaller amount of grease and grime that will accumulate.
If you only use it a couple of times per week,
You can get away with a monthly clean.
But if you find yourself in the aftermath of a large grilling event where the entire day was spent cooking over the grill, it’s best to take the time to perform a decent cleaning job at the end of it. The more meat, food bits, and grease that have the opportunity to fall through the cracks or get stuck to the grill top, the sooner you need to clean it off.
Additionally, you should clean the grill more thoroughly every 6 months or so, or seasonally if that makes more sense for the climate you live in. Before winterizing your unit and bidding freshly grilled outdoor stakes farewell for the colder months, you should go through a full grill cleaning process before stowing it away!

Read on to learn the steps for each type of cleaning process, both after use and end-of-season.
How To Clean A Grill After Use

Get your handy long-handled bristle brush and scrape refuse off the grill grates. If you don’t have one, use a ball of wadded-up tin foil and hold onto it with some sturdy tongs.

Use a cloth or paper towels to spread a thin coat of vegetable oil across the scraped grates to protect them and prevent harder-to-remove rust and grime.

Wash out the inside of your grilling lid with dish soap and a cloth.

Take the heat deflectors off the burners and wash them with dish soap. Dry and replace.
How To Clean A Gas Grill At The End Of The Season
The good news is that once you clean out and winterize your gas grill at the end of the season (or every 6 months), you don’t have to worry about it getting damaged or attracting critters while it is covered up and stowed away.
When you’re either done with grilling for the season or twice a year, follow these steps to keep your grill spotless until its next use:
Conclusion
Cleaning out your grill doesn’t have to be a task that you dread, particularly if you keep up with little jobs of removing grease and debris as they appear through the grilling season. It just makes the final deep-clean before winterizing the unit even easier if months’ worth of grease and food bits are not still clinging to the grill surfaces!
Plus, by keeping your grill clean, the overall taste of the dishes you prepare on it will be even better, not marred by secondhand flavors or burnt leftovers from a previous meal.
The possibility of grease fires, performance issues, and overall damage to your grill is also lessened by implementing a regular cleaning routine, so don’t delay— grab that bristle brush and get your grill gleaming today!
Key Questions
Gas Grill Guides & Tips
- How to Buy the Right Gas Grill
- Troubleshooting a Gas Grill That Won’t Light
- Natural Gas vs. Propane: Which Is Better?
- Ceramic Briquettes vs. Heat Shields
- The Science of Grilling Heat & Temperature
- Charcoal vs. Gas: The Physics of Grilling
- Cheap vs. Expensive Grills
- Guide to Every Type of Grill
- Tips for Year-Round Grilling